When my family wants to have home made Pizzas I always like to choose the healthier option for them. Hence I make my pizza base at home and from whole wheat flour which is surely more healthier than having the ones made from all purpose flour. So here goes.....I hope you guys enjoy baking these as much as I do. Also for those of you who do not have an oven, you can still make them just as I have. Read along and I'm sure they will come out as good as the ones from the oven.
INGREDIENTS:
3 cups of whole wheat flour.

1 heaped tspn of good quality active dry yeast.

1 tspn honey.
1 and 1/2 tspn olive oil.
Salt as per taste.
Water for kneading the flour.
2 tbspn tomato ketchup.
2 cups ready tomato puree.

Cheese of your choice - a handful for each pizza. (I have got the ready pack of grated cheese available in the local store which is a mix of mozzarella, Cheddar and Parmesan cheese).

VEGETABLE TOPPINGS:
1 Green bell pepper.
1 Red bell pepper.
1 Yellow bell pepper.
(All cut lengthwise into thin strips).

1 Big onion (cut lengthwise into thin strips).

Some chopped olives.

1/2 tbspn finely chopped garlic.

SEASONINGS USED:
1/4 tspn freshly crushed pepper.
1/4 tspn basil or oregano or any Italian pizza seasoning.
METHOD:
STEP 1:
Making the Pizza Base:

STEP 2:
Making the tomato sauce:

STEP 3:
Keep all the toppings ready. You can use toppings of your choice like paneer tikka, corn, sun dried tomatoes, Jalapenos, mushrooms etc. Again you can get creative and use different combinations on each pizza. For the Non veggies you can use sausages cut into round discs, pepperoni, salami, chicken tikka etc.
First lets do the STEP 1: Making the Pizza Base:
Take 1/2 cup of water and heat it.

Put your little finger to check the temperature of the water. You should be able to bear the temperature of water at the same time it should be more warmer than luke warm. If you can put your finger in comfortably than the yeast will be able to sustain in the hot water as well.

Add the honey.

And stir well so the honey dissolves.

Add yeast.

And stir again till the yeast dissolves. Cover and keep it aside for about 3-4 minutes. In winters keep this yeast preparation in a warm place like inside the microwave or oven but be sure you don't switch on your appliances if your yeast is inside!

Add olive oil in the flour.

Add Salt as per your taste.

Add freshly crushed pepper.

Add seasoning of your choice (either basil or oregano or a little of both or any ready Italian pizza seasoning).

Now mix and knead your flour.

See the yeast preparation now after 3-4 minutes of keeping aside. The yeast preparation will have bubbles in it. First add this yeast preparation into the flour little by little and start kneading followed by addition of water adding bit by bit and bringing all the dry flour together so to form a nice soft dough. (not too soft though - be careful not to pour too much water at one time).

Your dough will look like this as you knead it:

Once the dough is done make a fist punching it down with your body weight and then bringing it together to make a big ball repeating the punching and bringing together of the dough 2 to 3 times or doing it for about 5 minutes adding very little water bit by bit if needed. This process helps to make a nice soft dough.

The dough is ready now. Press down with a finger to check the softness.

Cover it with a wet cloth and keep the dough aside for an hour. In winters keep in a warm place so the dough rises well. I normally make my dough in the morning and roll the base in the evening.

I kept it for more than an hour. The dough has risen and is almost double in size. This is how the dough looks now:

Divide the dough into smaller balls now depending on how big you want your pizza to be. I have divided the dough into 9 balls as you can see:

Roll between your palms to make a nice smooth ball and then flatten between your palms:

Dip both sides of the dough into dry wheat flour:

And now start making the base with a rolling pin sprinkling some dry wheat flour onto the surface of the base if the base gets sticky or difficult to roll. You can decide the thickness and diameter of your base as per your preference.

As you can see my base is ready now:

There is an additional step here. I do not like adding the toppings on the raw flour base. In my opinion the final texture of the pizza is better when they are cooked lightly before you add your toppings and before they go into the oven.
To get these ready now: Heat a non stick pan on a medium flame.

Once the pan is hot lower the flame and slide the pizza base into the pan.

Flip onto the other side and cook very lightly on both sides.

Remove from the pan and keep the base on a plate with a paper towel below the pizza base or else the bottom will get wet and soggy.

I have cooked them all very lightly and stacked them up as you can see here:

Finally the base is ready. It looks like a long procedure but it is not really that time consuming. If you plan well making pizzas is really effortless.
Now lets do STEP 2: Making the tomato sauce:
Heat a non stick pan on a medium flame.

Once the pan is hot add 1 tbspn of olive oil.

Add finely chopped garlic and let it sizzle (for 4-5 seconds). Do not over cook or make them brown.

Add the tomato puree now.

And stir well and cook on a medium to low flame.

Add tomato ketchup. This gives a nice sweet and sour taste to the sauce. You may want to taste and adjust the amount of ketchup you would like to add in your sauce.
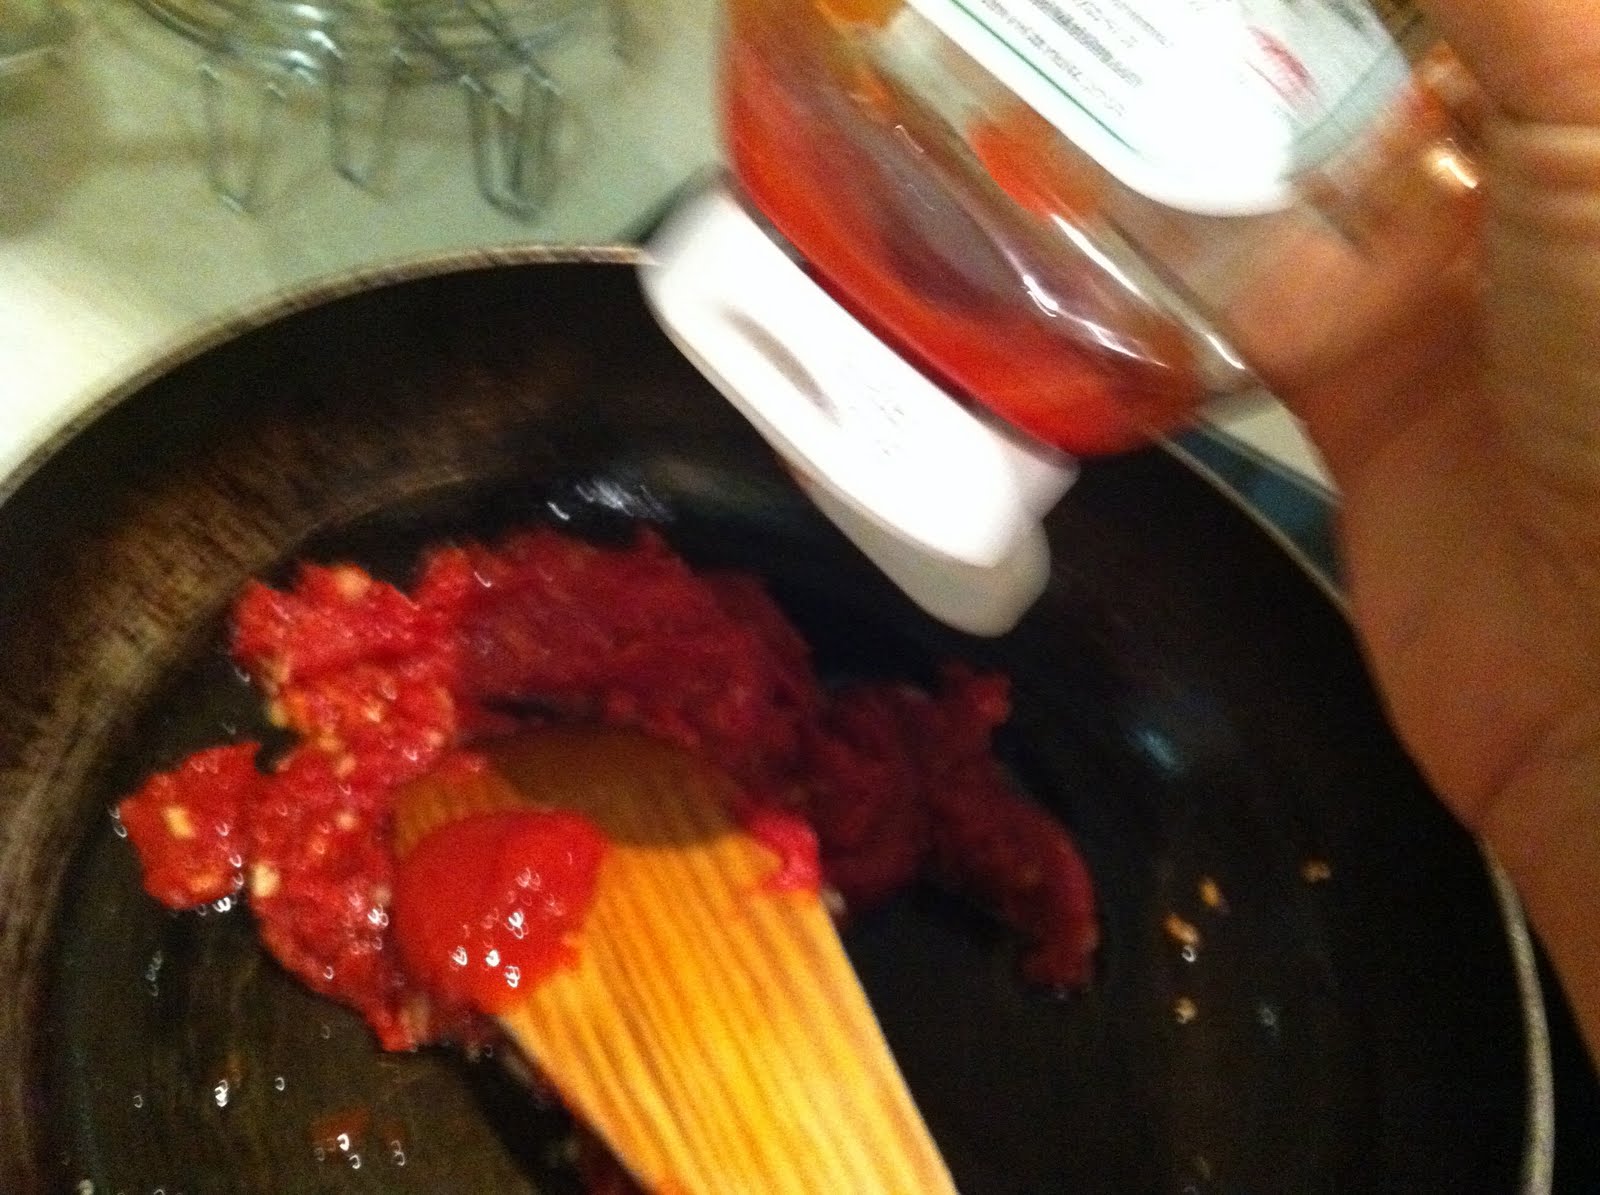
Stir well and add some water (around half cup) since the ready tomato puree is always very thick and concentrated.

You can decide the consistency of the sauce however keeping in mind not to make it too thin or runny.

Add salt as per taste.

Add 1/4 tspn seasoning of your choice (either basil or oregano or a little of both or any ready Italian pizza seasoning).

Add freshly crushed pepper.

Stir well so all the flavors blend well. Switch off the gas, cover and keep aside. Tomato sauce is ready.

Lets do the STEP 3: Do the Pizza topping:
Pre heat your oven at 200 degree Celsius for 10 minutes.
Take your pizza base and add the tomato sauce. I add around 2-3 tbspn of sauce.

Spread the sauce evenly on the base:

Add all the bell peppers evenly on the base (or the toppings of your choice):

Add the onions:

Add the cheese evenly:

Add chopped olives:

Now your pizza is ready to go into the oven:

Put the pizza into the oven. Bake at 200 degrees Celsius for 15-20 minutes. However you must open the oven and check after the first 10 minutes. You can bake a little more if you like the cheese to have a golden and crispy texture or bake less if you like just that molten white cheese depending on your preference.

Home made whole wheat pizzas are ready. Cut into slices and enjoy them. The pizza base can be replaced by whole wheat bread if on a certain day you are short of time or just too lazy to go all the way.
For all those who do not have an oven, don't worry. You can still make the pizza! Instead of putting the pizza into the oven just microwave your pizza for about 30 seconds or till the time you see the cheese on the top of the pizza melting. Once the cheese melts bring it out and keep it on a hot non stick pan on a very low flame. Cover with a lid and keep checking so the base of the pizza does not burn and at the same time can get the right crisp texture.
The 3 cups of flour makes 9 thin crust pizzas of 6-7 inches each. My family enjoys the thin and crisp ones however you can make thick ones if you prefer the thick and soft ones. I hope this recipe is helpful and that now you will be able to make your own pizzas at home from scratch!
Vegetables are a must on a diet. I suggest carrot cake, zucchini bread, and pumpkin pie. ~Jim Davis
No comments:
Post a Comment